Navigation
For a new user, it might take a while to get started with using EDE, because you are not yet familiar with the interface. To help you navigate within the editor, we have created a general guide to the layout below.
Additionally, we have provided a shortcuts section to explain every shortcut the program offers and help you understand how EDE works.
Layout
General Layout
Here is a general overview of the editor
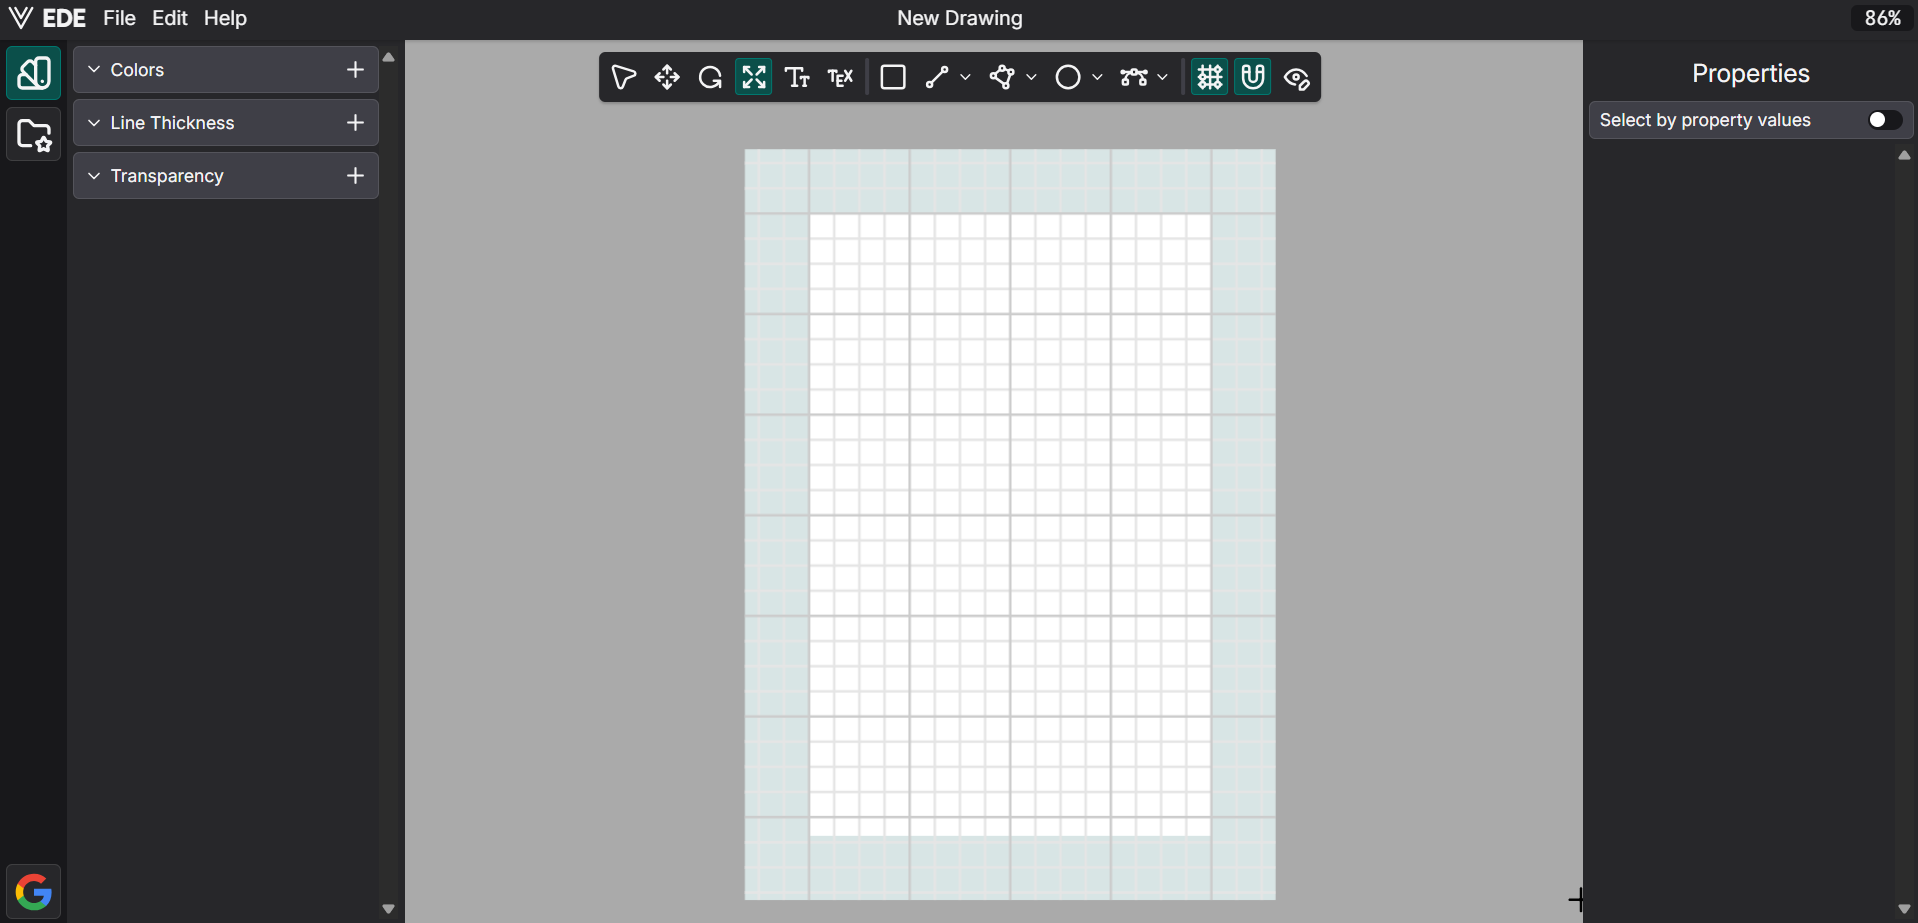
as you can see it is divided into several sections:
- Topbar
- Toolbar
- Project title
- Canvas toggles
- Properties
- Sidebar
Topbar
In this section you find 3 different tabs.
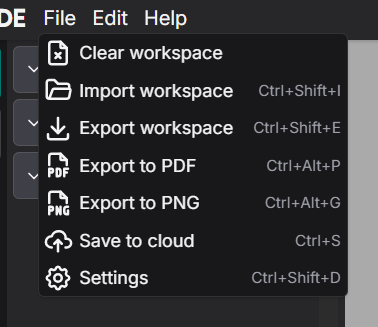
File
Within the file tab you can find options to import and export the workspace, export to PDF and PNG, save to cloud and go to the settings.
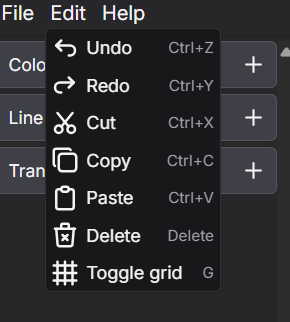
Edit
Within the edit tab you can find several different options to edit the canvas and a number of settings.
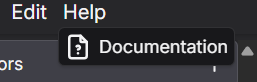
Help
Within the help tab you can find the documentation page, where the user guide you are currently reading is located.
Toolbar
On the toolbar you can select the different tool you need to draw the shapes.
From left to right you have the following options:
-
The select tool
-
The translate tool
-
The rotate tool
-
The scale tool
-
The text tool
-
The LaTeX text tool
-
The rectangle tool
-
A dropdown for the vertex and line tools.
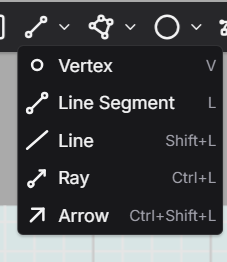
- A dropdown for the special line tools.
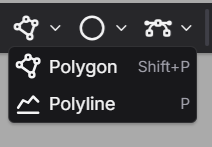
- A dropdown for the circle tools.
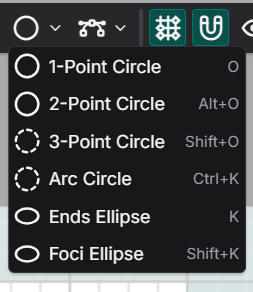
- A dropdown for the spline tools.
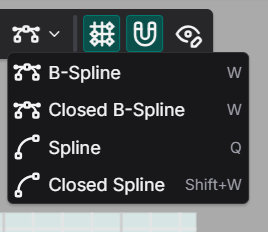
For more information on these shapes and how to use their tools, see "Shapes".
Project Title
At the top of the screen you can find the drawing title, you can rename this as you wish.
Canvas Toggles
On the toolbar, on the right side are 4 toggles:
- Snap to grid: if turned on, the cursor will snap to the intersections of the grid
- Shape snapping: if turned on, the cursor will snap to shapes, controlpoints, and intersections
- Show controlpoints: if turned on, all controlpoints within the selected page are made visible.
- Lock tool: if turned on, the selected tool will remain selected after placing a shape. If turned off, the selected tool will be deselected after placing a shape.
See the "Settings" user guide page for more information.
Properties
Here you set and adjust the several properties of a shape
At the right of the screen, you can find the properties panel where you can find the name of the property. At the right side of the tab you can set the value.
Properties are split into several different sections such as Fill, Stroke, Appearance and Advanced where each section is collapsable and contains their own respective properties.
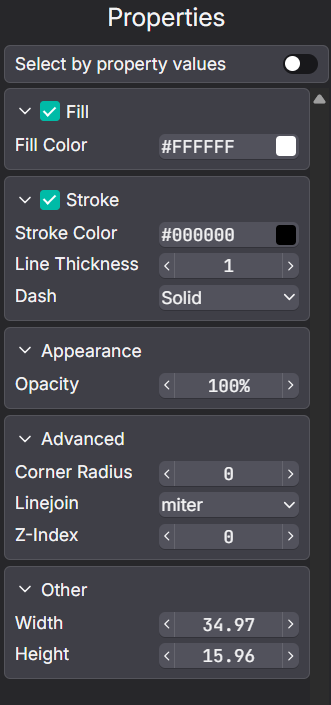
See "Properties" for more information about the properties.
Sidebar
Here in the sidebar, there are 3 tabs which can be clicked on. From top to bottom are the following options:
- Style panel:
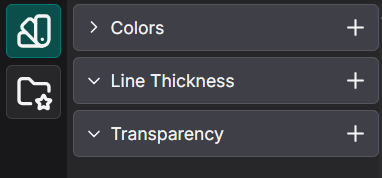
Here you can change variables such as color, line thickness and transparency.
- Style groups panel:
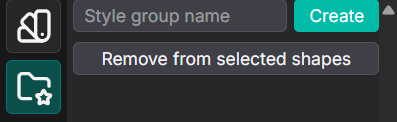
Here you can add, delete and edit style groups. See the properties page for more information about style groups.
Shortcuts
There are several different shortcuts that you can use in EDE. Below is a quick overview for every shortcut, including their keybind and what they do.
Keep in mind that these are the default Ede keybinds. You may also select the keybind preset that Ipe uses, or customize your own configuration. If you want to configure a specific shortcut or simply want to look back at what you set for a shortcut you can use the seachbar within the configuration screen.
It is possible that not all tools or actions are listed here. Ede is in active development and they need to be manually added to the documentation. Look at the keybind configuration screen in the settings to see all available shortcuts. (some shortcuts aren't listed there as well...)
Tools
Select Select
Key: s
Function: Selects the select tool.
Select Translate
Key: t
Function: Selects the translate tool.
Select Rotate
Key: a
Function: Selects the rotate tool.
Select Scale
Key: Shift + s
Function: Selects the scale tool.
Select Text Box
Key: Shift + b
Function: Selects the text box tool.
Select LaTeX
Key: Shift + t or $
Function: Selects the LaTeX text tool.
Select One-Point Circle
Key: o
Function:Selects the one-point circle tool.
Select Two-Point Circle
Key: Alt + o
Function:Selects the two-point circle tool.
Select Three-Point Circle
Key: Shift + o
Function:Selects the three-point circle tool.
Select Ends Ellipse
Key: k
Function: Selects the ends ellipse tool.
Select Foci Ellipse
Key: Shift + k
Function: Selects the foci ellipse tool.
Select Arc Circle
Key: Ctrl + k
Function:Selects the arc circle tool.
Select Vertex
Key: v
Function: Selects the vertex tool.
Select Rectangle
Key: r
Function: Selects the rectangle tool.
Select Line Segment
Key: l
Function: Selects the line segment tool.
Select Arrow
Key: Ctrl + Shift + l
Function: Selects the arrow tool.
Select Ray
Key: Ctrl + l
Function: Selects the ray tool.
Select Line
Key: Shift + l
Function: Selects the line tool.
Select Spline
Key: q
Function: Selects the spline tool.
Select Closed Spline
Key: Shift + q
Function: Selects the closed spline tool.
Select Bézier Spline
Key: w
Function: Selects the bspline tool.
Select Closed Bézier Spline
Key: Shift + w
Function: Selects the closed bspline tool.
Select Polyline
Key: p
Function: Selects the polyline tool.
Select Polygon
Key: Shift + p
Function: Selects the polygon tool.
Utilities
Zoom In
Key: =
Function: Zooms in onto the canvas.
zoom-out
Key: -
Function: Zooms out of the canvas.
Recenter Canvas
Key: Ctrl + 4
Function: Places the viewport back at the default position after moving the canvas.
Toggle Grid
Key: g
Function: Turns the grid in the background on or off.
Toggle Control Points
Key: f
Function: Shows or hides all unselected controlpoints.
Toggle Grid Snapping
Key: f7 or 7
Function: Turns snapping to grid on or off.
Toggle Shape Snapping
Key: f6 or 6
Function: Turns snapping to controlpoints, shapes and intersections on or off.
Saving
Save Workspace
Key: Ctrl + s
Function: Saves the workspace
Import Workspace
Key: Ctrl + Shift + i
Function: Opens a file window to open a local .ede file.
Export Workspace
Key: Ctrl + Shift + e
Function: Opens a file window to save the current workspace locally into an .ede file
Exporting
Export PDF
Key: Ctrl + alt + p or Ctrl + alt + π
Function: Exports the selected page in PDF form.
Export PNG
Key: Ctrl + alt + g or Ctrl + alt + ©
Function: Exports the selected page in PNG form.
Miscellaneous
Delete Shape
Key: Delete or Backspace
Function: Removes all selected shapes.
Copy Shape
Key: Ctrl + c
Function: Copies the selected shapes to your clipboard.
Paste Shape
Key: Ctrl + v
Function: Pastes the copied shapes onto the canvas.
Cut Shape
Key: Ctrl + x
Function: Copies the selected shapes to your clipboard and removes them.
Undo
Key: Ctrl + z
Function: Undoes the last action.
Redo
Key: Ctrl + y or Ctrl + Shift + z
Function: Redoes the last undone action.
Cancel
Key: Esc
Function: Cancels the drawing when drawing a shape.
Select All
Key: Ctrl + a
Function: Selects all everything on the canvas.
Deselect All
Key: Shift + d
Function: Deselects all everything on the canvas.
Edit Canvas Settings
Key: Ctrl + Shift + d
Function: Opens the edit canvas settings menu.
Finish Shape
Key: Enter
Function: Finishes the drawing when drawing a shape.
Settings
Edit Canvas Settings
Key: Ctrl + Shift + d
Function: Bring up the settings window